petak, 30. listopada 2015.

Prepping The Hair

Hair preparation is very important for every hairstyle you do. If you don't put the rollers in properly you might not get a good base to work with. Direction of your rollers is also important as it sets the hair in a certain direction. 

I started by sectioning the front of the wig into a side parting. I used heated rollers at the front; three on one side and four on the other, then two on each side going sideways. For the rest of the hair I used brickwork, to prevent sections from showing. This time we didn't use heated rollers. we used a curling tong with a medium to large sized barrel. Each section was pinned. When the entire head was curled, I left it to cool down before taking out the rollers. 


Heated rollers - side
Heated rollers - front / top
Heated rollers - side
 Pincuring
Curling
Everything curled and pinned
Brick work - final look
Created on: Oct 29 2015

srijeda, 28. listopada 2015.

My First Mustache

I have finally completed my first ever mustache. It took me about 2-3 weeks only because I left it for a while, but it took me only a few hours to finish it. However, I still need to style it. I will cut the hair that is covering the upper lip and maybe make the sides shorter.  

Originally, I wanted it to look like a 'mexican mustache', but looking at the final product it looks like the ones that Samurai have, but I don't mind. 

Mustache and template
Mustache on the block
Close up
Close up


I really enjoyed making this and I want to make something else, maybe some sidies, or another mustache in a different style. 

ponedjeljak, 26. listopada 2015.

How To Pin a Lace Wig

Lace wigs are very fragile and very expensive so you have to be very gentile with them. You never put a wig on someone's head and then style them - you style them on your block and when the wig is ready you put it on their head. When pinning it on the block always thing about where the centre of the head is, the hairline and ears.

To pin the wig down you will need a galloon band and some pins. Spray some water on the galloon (to smooth the edges of the lace) and place it right at the edge of the lace. Find the middle of the lace and start pinning. Use a lot of pins so the wig doesn't come off when you're brushing it. Make sure the you hold the lace straight otherwise the wig won't be pinned properly. Keep the hair out of your way. Take the galloon right up to the top of the ear and pin all the way up. 

Lace wig on the block
 Pinning the galloon
  Pinning the galloon
  Pinning the galloon


When you fisnish pinning the front you will need a couple of big T pins to pin the wig at the nape of the neck. Put one in each corner, then one between that pin and the ear, and one right up in the middle of the head. Pin them at a slight angle, that way they won't come out when you brush the hair. 

 Pin at the nape of the neck
Created on: Oct 23 2015

nedjelja, 25. listopada 2015.

Wrapping Hair

Lottie showed us how to prep the hair for the wig using the pin curl technique and/ or a french braid, but this time Helen showed us how to wrap the hair. This technique is very good to use if your model has a lot of hair. 

When you are working with wigs that have fine lace use pins without the rounded ends because it is hard to poke through and you might end up ripping the lace. But here we used acrylic wigs and normal pins are fine. 

My model has fringe so I just pinned them back instead of pin curling them. Then I pincurled around the front; five curls, one at the top and two on each side. Keep them as flat as possible so the wig sits nicely on the head. Cross your pins so the curls stay in place. The curls are your achor points. 


Before you start twisting the hair make a really big pin curl at the crown of the head. Then take a section from one side and wrap it around the curl. Make sure the hair is as smooth as possible. Do the same on the other side. Then you will be left with the bottom section at the nape of the head. Take the middle section and wrap add it to the wrap. Pin curl other two sections (one on each side) as they will be your anchor points and help you pin down the wig.


Ask your model to hold the front of the stocking cap and put it on the head. Place it just past the hairline, never too far forward (expecially if you are working with a lace wig). Then use a pintail comb to tuck the baby hair under the cap so that there's nothing sticking out. 
Take the pins and secure the edges. You go in and out on the stocking cap, get a piece of hair and under. This way everything will stay in place and won't move.


Stocking cap

Ask your model to hold the front while you put the wig on. Look where the hairline sits when you're putting it on. Find the little bits on the side of the wig that should stick by the ear and use them to place the wig on properly. When these end are in place that's when you know the wig is on straight. Use bigger pins and pin them through the wig onto the pincurls - that will stop the wig from moving around or falling.

Final look
Final look
Model: Lily Thompson
Look created on: Oct 23 2015


subota, 24. listopada 2015.

70's /80's Punk Hair (2nd Look)

This is a more contemporary version of the 70's and 80's punk mowhawk with a fashion twist. It is very simple to create and it is all about sectioning. You get the best results if the hair is textured, expecially crimped. The longer the hair, the better.

First I sectioned the hair into four even sections. Use a loom band to tie each section and make sure they are all possitioned in one line going from the front to the nape of the neck. 

Hair sectioned into 4 pony tails


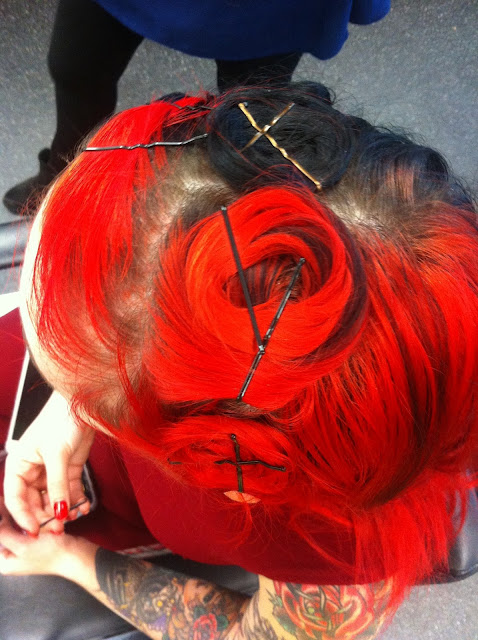
Then take each section, wrap it around your finger and use two hair grips to pin it down. As you're twisting the hair think about placement and pin it where the other twist end so you get a nice flow. So all you do basically is you make 4 little buns/ twists then connect them with fine pins. 

All sections twisted and pinned down
Connecting the sections with fine pins
Final look - Back/ Side
Final look - Front
Final look - Top
Look created on: Oct 23 2015


I loved creating this style. It is very simple, and easy to create, yet very effective. The second section is not properly placed, it would look better if I pinned it on the right side rather than left. I think I might use this hairstyle for one of the looks in my short fashion film. 

70's/ 80's Punk Hair (1st Look)

There are many different variations of the 70's/80's mohawk, everyone who wears it styles it the way they prefer it. The to get this pun hairstyle is to have volume and texture on the top and have the sides tight and smooth.

Braids & Mohawk Oh man this is so 80's and I love it. I have hair like this and if my momma would let me . . .:
Braid and a mohawk
Punk Hair
(Source: http://mycurls.me/myphotos/)
Image found on: Oct 24 2015

Punk Hair
Unknown model
(source: https://www.pinterest.com/sabrinalowney/mohawk/)

"Superhuman Powers" | Model: Agnete Hegelund, Photographer: Mariano Vivanco, Dazed & Confused, July 2008:
"Superhuman Powers"
 Model: Agnete Hegelund
 Photographer: Mariano Vivanco
Dazed & Confused
July 2008
(Source: http://noirfacade.livejournal.com/747315.html)
Image found on: Oct 24 2015

To create this look first you will need to section the hair. Create a slight V shape going from the front all the way down to the nape of the head. That is the section that you will style with heated rollers to get lift and volume, the sides will be braded. I had to use two rollers for one section because it was too wide for only one roller. Make sure the rollers sit right on the roots. 

Sectioning the hair
Putting the rollers in
All the rollers in - back
All the rollers in - left side
All the rollers in - from the top

When you are done with rollers, braid the sides whilst you're waiting for them to cool down. You can do any kind of braid you like, I did a fishtail braid. To hide the hair band and the end of the braid I twisted the ends into little ringlets and pinned them in. 

French braid - right side
French braid /ringlet - left side
French braid - left side

Then take out the rollers and backcomb each section. This look is all about texture and volume, so the backombing  has to be hard and structured, but don't be agressive.  Then use a dressing out comb to style the edges and bring the hair back. 

Backcombing the hair
Final look - Front
Final look - Back
Final look - Side
Look created on: Oct 23 2015


I must say, the braid that I did on the left side is the best fishtail braid I've ever braided and I an very proud of myself. However, I still need to work on my backcombing...

subota, 17. listopada 2015.

60's Beehive


The beehive was a very popular hairstyle for women in the 1960's. The hairstyle got its name because of the beehive structure. It was worn either half or fully up. Audrey Hepburn in Breakfast at Tiffany's (1961) had the perfect and classy beehive that all women copied, while Amy Winehouse brought back the messy half up half down version of the hairstyle.

Audrey Hepburn hated danish. breakfast at tiffany's .:
Audrey Hepburn
Breakfast at Tiffany's
1961
(Source: http://www.buzzfeed.com/summeranne/women-who-prove-style-peaked-in-the-60s)
Image found on: Oct 17 2015
The bee hive hairdo:
Beehive
Janie Hutchens
1960's
Posted by: Ethan / March 2011
(source: https://www.flickr.com/photos/42353480@N02/5581656838/in/photostream/)
Image found on: Oct 17 2015


The Ronettes
1960's
Posted by: CindyCelebs
(source: http://fanpix.famousfix.com/0109658/016261562/the-ronettes-picture.html)
Image found on: Oct 17 2015
60s-Inspired Hair Editorials - The Merci, Bardot Editorial for Elle Denmark Depicts Supersized Locks (GALLERY):
Contemporary version of the 60's beehive
The Merci, Bardot Editorial for Elle Denmark
(Source: http://www.trendhunter.com/trends/60s-inspired-hair)
Image found on: Oct 17 201
Penelope Cruz wears an Audrey Hepburn inpired Beehive topnotch:
Penelope Cruz wears an Audrey Hepburn inpired Beehive (Source: http://hubpages.com/style/The-Ponytail-Rides-Again)
Image found on: Oct 17 2015

Amy Winehouse
 MTV Movie Awards in Los Angeles
June 3, 2007

(source: 
http://www.seattletimes.com/life/lifestyle/recreate-amy-winehouses-beehive-on-your-head/)
Image found on: Oct 17 2015


Practice in class:

First, I  sectioned the hair at the crown of the head and created side parting at the front. The create volume we used brick work and heated rollers. Brickwork was used to avoid gaps. When doing brickwork always work from the centre out. It is important that the section of the hair is not wider than the roller and that it sits right on the root of the section, otherwise you won't get the lift. We used red and blue rollers for this look (the biggest ones we have). You lift the hair up, away from you and roll it around the roller. Hold the tension or you will not get the lift that you want. Use your pintail comb to pick up the stray hair. When you put the roller in, use clips to secure it in place. Do not take it out before it cools down, 5 minutes at least, otherwise the curl won't fully develop and it will drop. Also, the direction of rollers is very important, make sure the curls are going away from the face. Each side of the head has to have the same amount of rollers.  The rollers were put in sideways at the front.


Sectioning the hair
Putting heated rollers in/ brickwork


All of the rollers in
Brickwork completed

When the hair is all cooled down take out the rollers. Use hairspray and backcomb the sections at the crown of the head. 
To create the actual hairstyle you have to. then bring all of that hair together and twist the ends in, keeping the top in a nice big rounded shape. Hairspray! If you want to put all the hair up, first take a section from the opposite side, wrap it and pin, then repeat twisting the ends inwards. You can bring the front section back, or leave it down. If you want to bring it back, do it when you're bringing the rest of the hair, to get a nice smooth look. 
To get a better grip with the pin, first bring it out and take the opposite direction of what you want it to go, then bring back in. This way will need less hairgrips and it will be more secure. To finish off and blend all the hair together, use a fine pin to create the shape you want and put it in. 

Taking out the rollers
Backombing
Final look - Back
Final look- Side
Final look- Side
Final look- Front
Look created on: Oct 16 2015

My beehive didn't really turn out as it should have as it ended up having more of a round shape at the back rather than the beehive shape and the section at the crown should have been bigger. Also, the pins are showing.